Vacuum Bleeding Brakes
Step-by-Step
Exclusively from Air Zapper
Vacuum Bleeding Brakes
Easy Fluid Replacements
Exclusively from Air Zapper
Fast Delivery/ Easy Returns
12-Month Warranty
One Day Handling Time
Fast Delivery/ Easy Returns
12-Month Warranty
One Day Handling Time
Free USA Delivery/ Returns
12-Month Warranty
One Day Handling Time
Timeline for Vacuum Bleeding Brakes
When you bleed brakes with vacuum pump, the duration of the job can vary depending on a few factors. However, with the right tools and technique, you can expect to complete the task within a reasonable timeframe.
On average, it should take around 30 minutes to 1 hour to complete a vacuum bleeding brakes job. This timeframe includes the time required for preparation, bleeding each brake line, and ensuring the system is properly bled. However, it's important to note that this can vary depending on the complexity of your braking system and your level of experience.
To provide a more accurate estimate, let's break down the process into steps:
1. Preparation (5-10 minutes)
2. Bleeding each brake line (10-15 minutes per wheel)
3. Final check and clean-up (5-10 minutes)
Procedure for Vacuum Bleeding Brakes
Brake bleeding is an important maintenance task for any DIYer or car enthusiast. Properly bleeding the brakes ensures that there is no air trapped in the brake lines, which can lead to inefficient braking performance or even brake failure. One effective method for bleeding brakes is using a vacuum bleeder tool. Here's a step-by-step guide on how to properly vacuum bleed brakes:
1. Preparation:
- Park your vehicle on a level surface and engage the parking brake.
- Put on eye protection and gloves to protect yourself from any potential brake fluid splashes.
2. Gather the necessary tools and materials:
- A vacuum bleeder tool with clear plastic tubing and an adapter to connect to your bleeder screws on your calipers and a container to collect the old brake fluid.
- A wrench or socket set to loosen and tighten the bleeder screws.
3. Locate the brake bleeder screws:
- Each brake caliper or wheel cylinder has a bleeder screw. They are typically located on the backside of the caliper or cylinder. You may want to remove the wheel for better access to the bleeder screws.
- Consult your vehicle's owner's manual or a repair manual for the exact location and size of the bleeder screws.
4. Prepare the vacuum bleeder tool:
- Attach the clear plastic tubing to the bleeder screw fitting on the vacuum bleeder tool.
- Make sure the tool is properly sealed to prevent any air leaks during the bleeding process.
5. Bleed the brakes:
- Start with the brake furthest from the master cylinder (typically the rear passenger side) and work your way towards the closest (typically the front driver side).
- Loosen the bleeder screw with a wrench or socket set. Be careful not to strip the screw.
- Place the other end of the clear plastic tubing into the container to collect the old brake fluid.
- Activate the vacuum bleeder tool to produce the vacuum until you see brake fluid flowing through the tubing.
- Continue pumping until you no longer see any air bubbles in the fluid and only see a steady stream of brake fluid extract into the clear tubing.
- Tighten the bleeder screw once you have finished bleeding that brake.
- Repeat this process for each brake, working your way towards the master cylinder.
6. Check the brake fluid level:
- After bleeding all the brakes, check the brake fluid level in the master cylinder reservoir.
- If necessary, top off with new brake fluid to bring the level up to the recommended mark.
7. Clean up and dispose of old brake fluid:
- Properly dispose of the old brake fluid according to local regulations.
- Clean up any spills or drips with a rag and brake cleaner.
- Remove the clear plastic hose from the vacuum bleeder tool and clean it thoroughly.
- Store the vacuum bleeder tool and other tools in a safe and organized manner for future use.
Vacuum bleeding brakes is an effective and efficient option for removing air from the brake system. By following these steps and using a vacuum bleeder tool, you can ensure that your brakes are properly bled and functioning at their best. Remember to always consult your vehicle's owner's manual or a repair manual for specific instructions and safety precautions. With a little practice and attention to detail, you can confidently bleed your own brakes and save money on costly mechanic fees. Happy bleeding!
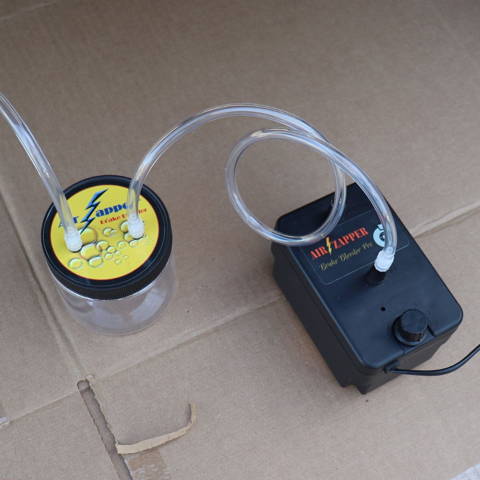
Great Brake Bleeder Kits for Cars, Trucks, and Motorcycles
Our vacuum bleeder tools makes vacuum bleeding brakes or full fluid replacements so easy. Just turn it on and watch the fluid flow hands free. This leaves you free to do other things, like make sure your fluid supply doesn't run dry. Set up is easy. Get yours today. Vacuum bleeding brakes has never been easier.
PRODUCTS